What Works As Nautical Home Decor In Your Bathroom
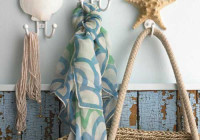
Wouldn’t it be great if you could simulate the warm blue sea and breeze, much like when you’re on boat, into your bathroom décor? Don’t you feel good and refreshed when you get extremely close to the sea and feel the warm breeze? With nautical home décor, you can mimic the exact same experience right inside your bathroom,… Read More »