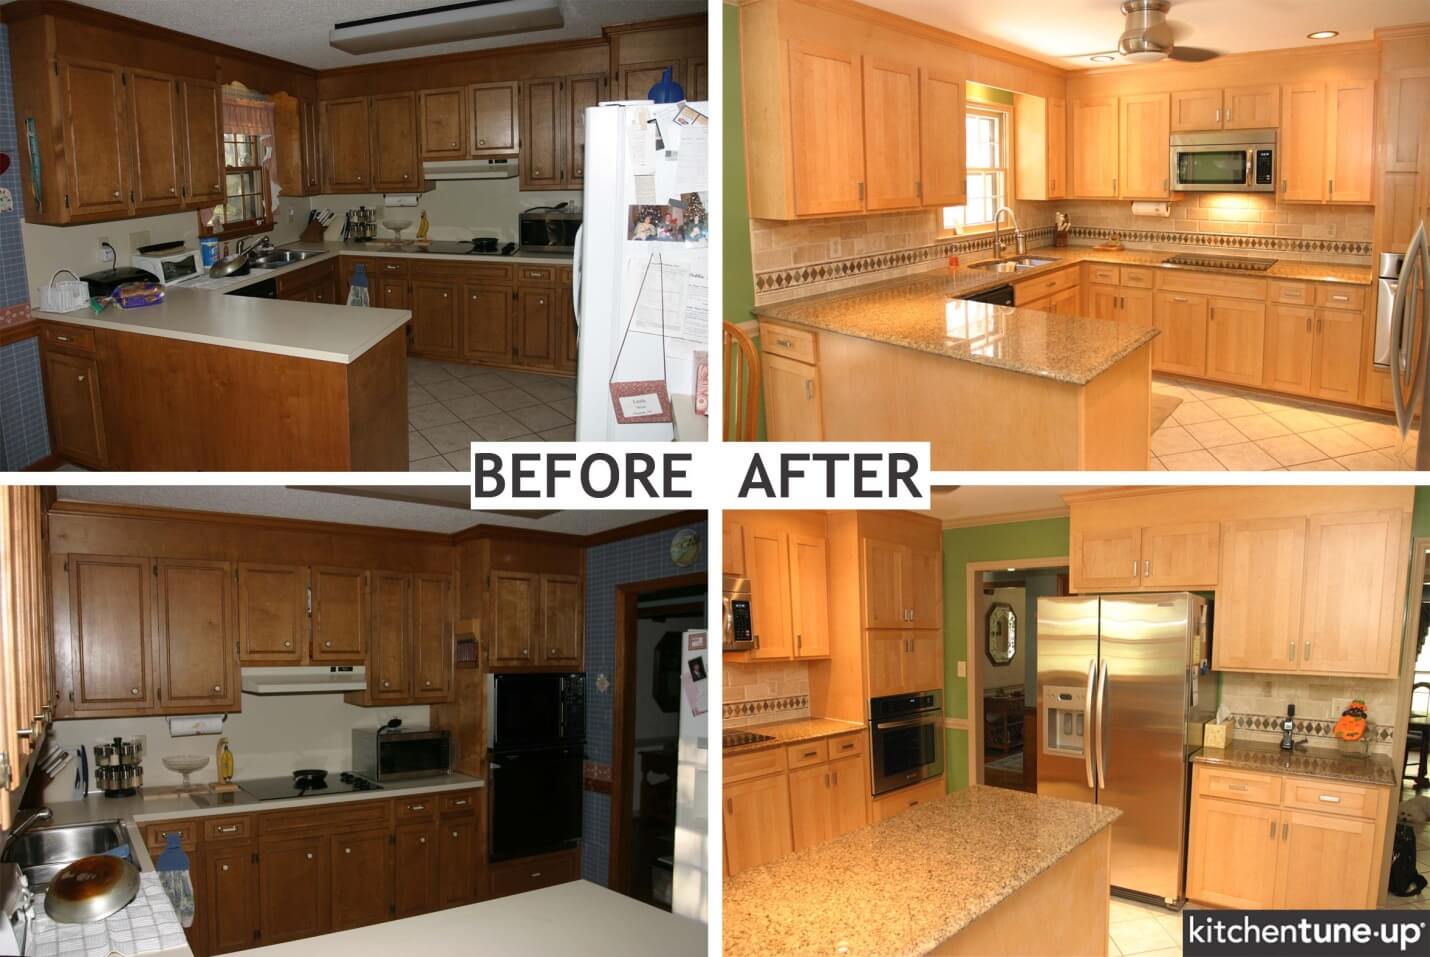
 Homemakers are often pumped with DIY flair and want to know how to refinish their kitchen cabinets. Several of them also want to do this without subjecting their cabinets to stripping.
Good news is you can get this done, it’s possible. Slightly tough news is that you will need patience and no small amount of technical skills; no haphazard methods need apply:
- Use a drill or screwdriver to take your cabinets apart neatly. You cannot perform refinishing work with everything as it is; do not attempt that.
- The pulls and hinges could do with replacements but if you are happy with the ones you have, store them in Ziploc bags and label them. You shouldn’t forget what goes where and besides refinishing kitchen cabinets is going to take a while.
- Choose a workspace with the best ventilation you can find. Set up sawhorses and tables here and take your kitchen cabinet segments over to this spot.
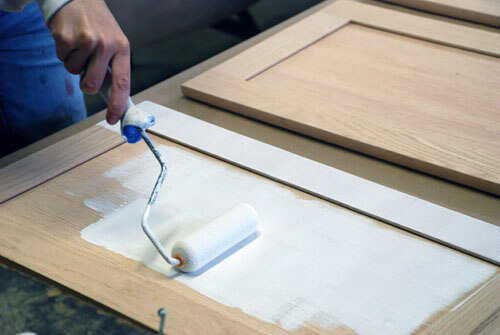
After such preliminaries, you are going to get your hands dirty with real work, in this case cleaning and drying your cabinets (rubber gloves are called for)…
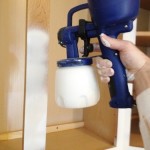
- Refinishing includes repainting. Using trisodium phosphate solution, and clean the surfaces you plan to paint.
- Use a well-wrung wet sponge to rinse the surfaces; leave to dry.
- Using 150-grit sandpaper, gently sand the surfaces after they are well and truly dried.
- Between a vacuum and a wet cloth you can get rid of all the accumulated dust.
Suppose you are of a mind to get whole new cabinets. You cannot use the same screw holes you drilled before so fill those up with putty, if needed. Use painter’s tape to mask the cabinet surfaces around the boxes. Use drop cloths on floors and counters.
Move Into The Priming Zone
- One coat of sealer or primer is all you need. Apply it.
- Bear in mind that if you have a color choice other than white in mind, asks for primers with that tint. This way they will match the top paint coat.
- The reason for this is to help you avoid making two coats instead of one. In lieu of two paint coats over the white primer, you need apply just one over a properly tinted primer.
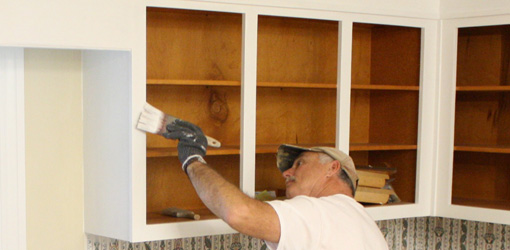
- When painting the cabinet boxes, the out-facing surfaces are your priority. If you want to take the same color to the insides, use a brush as opposed to a roller.
Your aim is to get as much painting done between drying. Paint the faces and edges of one cabinet segment, and take your work over to the drawer faces while the other dries. Go back, paint the other side of the cabinet face, and so on.
The whole ensemble needs to dry overnight. If some parts cannot be painted because they are against the covered floor, carry them over into tomorrow’s quota.
- The next day, sandpaper the painted surfaces using 220-grit wet/dry.
- Use a vacuum and wet cloth to get rid of excess dust and tiny debris.
- A second coat of paint will now be called for.
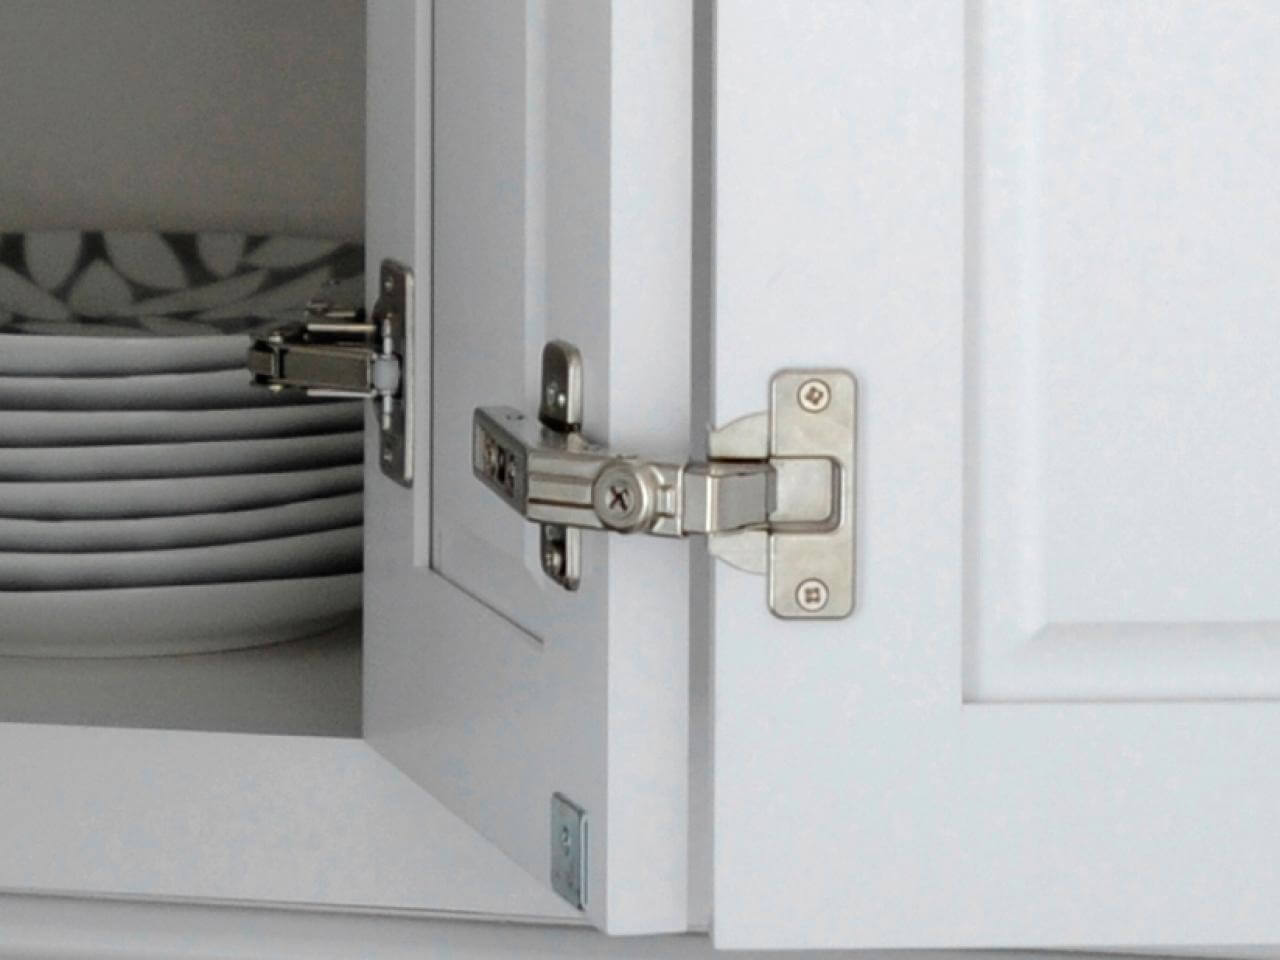
How To Replace Pulls & Hinges
 The simplest advice will be to purchase new cabinets that suit or match the ones you aim to replace or refinish. This will help ease your shopping woes remarkably. However, no worries if the opposite is the case, you need only plug-in the old holes and drill anew.
- Your List: new hinges and pulls, tape measure, bits and drill to help with cabinet hardware fitting, pencil, screwdriver, and (only if required) a drawer pull jig.
- If you plan to use the holes already present, your workload is cut in half.
- If you need new holes to go, use the jig. This template lets you create consistent holes, properly spaced out. Once you measure the center of your cabinet, place the jig/template’s central hole on that mark and start from there. (That pencil and tape are looking rather useful now, aren’t they?)
One of the best things about this template is that it has holes that accommodate pulls of varying widths. For DIY kitchen cabinets, this jig is invaluable.
Concluding Stages
 Don’t forget to drill those pilot holes on the insides of those drawers. This way, you can aptly get the pulls into place. The hinges follow… Use a firm work surface, place the cabinet face flat atop it, and use regular measures to position and drill the hinges into the cabinets (e.g., the top hinge sits at a spot one hinge length below the cabinet’s doorstop).
Once you have pencil-marked where the hinge holes are going to go, drill as needed, and conclude your setup with a steady resembling of all the pieces. The doors need to be positioned against the cabinet boxes in their apt opening directions, properly line up the hinges to the frames, and as a rule of thumb attend to the top hinge and then the bottom one.
After all is said and done, you will have successfully refinished your kitchen cabinets and hopefully came out with better results than you expected before starting. Share with us your exprience.