You are a DIY enthusiast, you enjoy your house filled with your fruits of labor. Or you like refinishing kitchen cabinets which you treasure with memories. Or perhaps you need refinish kitchen cabinets to drive away the marks of time.
You need know how to Paint Kitchen Cabinets. Luckily, that’s what we will tell you.

You can of course DIY (do it yourself) this whole portion of kitchen decorating but it is advisable you pay to get the job done right. Painting kitchen cabinets can be rather tricky, especially if their design includes grooves, shapely elements, and other somewhat inaccessible spots and zones. However, since this guide is about doing it yourself, and if you are an independent homemaker, let’s get started on how you need to approach this process.
If, like several homeowners you went for wooden kitchen cabinets, then you are in luck. These are the most sublime surfaces to paint.
- Whether the wood is already painted, is stained (naturally or otherwise), or is unfinished you can still paint it. Such versatility is not available with other materials.
- Even with faux wood, the compressed kind, and MDF, you can certainly take sandpaper to its surface, making them viable candidates for a paint job as well.
- The whole idea is durability, namely, how long you want that paint to last. If, for instance, you have chosen laminates instead of wood, the paint will stay on for a considerably shorter time.
- If you are looking to re-paint, make sure that you apply liquid sandpaper to wood cabinets that have glossy finishes or are stained. A simple washcloth can be used to apply the liquid sandpaper.
With these initial steps out of the way, let us move into the preparation phase. Yes, preliminaries came above and prepping comes after. This stage is crucial.
A. Prepping
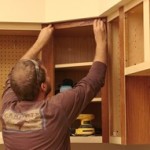
 This step begins rather obviously: you empty and clean the cabinets before beginning to paint. Even the handles and knobs need to go. The hinges must be given the once-over.
- If you are adept at spray painting kitchen cabinets, go for it; it’s faster and smoother. Otherwise, stick to the usual way.
- Label everything lest you fail to recall what goes where.
- The hinges, countertops, and any immovable appliances need to be covered or taped off as needed; do not want paint getting on any of them.
- Any misfits like holes or other such things? Take a wood filler to repair them.
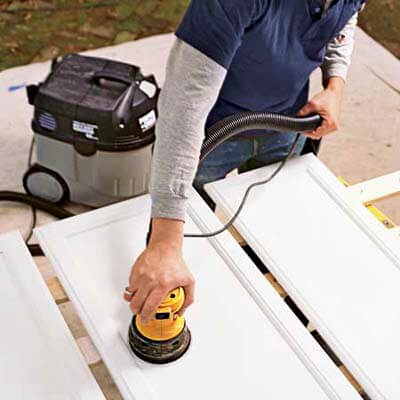
- The cabinets being flat surfaced will respond ideally to rotary sandpaper. This is one of the more important prepping points. The trickier sections can do with hand sanding. Pay attention to the edges of the cabinet doors too.
- Stained cabinets? Take 220 sandpaper to their surfaces. If you come across roughened textures like orange peels, take 120 sandpaper to the surface before shifting to a better one.
In case your cabinets are too marked, you will need to subject them to stripping.
B. The Power of Primer
 It is wise to note that paint products and all-paint primers are bad ideas. If it is permitted to use oil primer with paint where you live, go for it; but this is not allowed in several countries (check out VOC issues). So, how do you paint kitchen cabinets using primer?
- Generally, any waterborne paint that is water-soluble will work wonders.
- If you want to avoid brush marks in your aim to land that ideal finish, get some extender to go on this primer-type; it dries too quickly otherwise.
- If your cabinet is basically dark and you are hoping to get it painted a much lighter shade, your primer needs to be tinted to suit the final hue. This is a technical stage, so stay away from attempting this yourself if you feel you are inexperienced. Someone at the store or a professional painter can help you out with this.
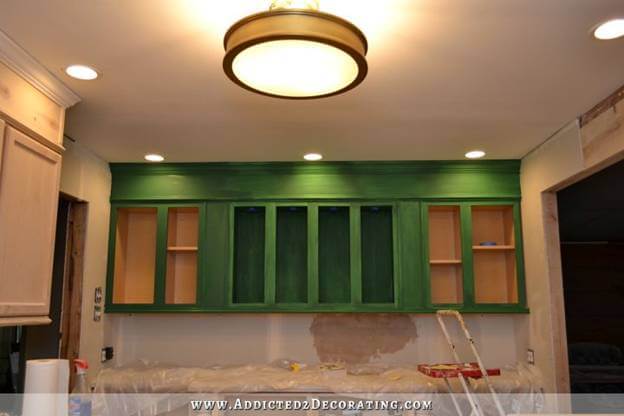
This is your base coat. Once it dries, be sure to lightly sand the surfaces before moving on.
C. Penny For Your Paint
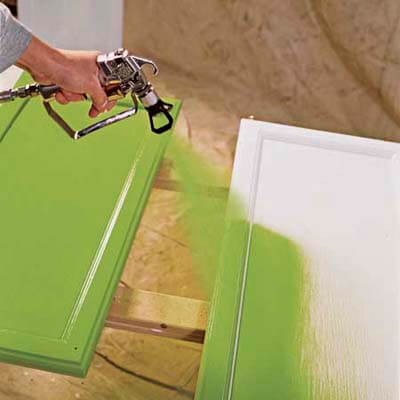 Never settle for sub-par paints. With all this work going into your task, you are ‘investing’ in quality paint not ‘splurging’ on it.
- Go for reputed brand-name paints in this regard.
- Kitchen cabinets will thank you for that extra coat of paint; that’s two coats.
- The best brush for this job is a 2 to 2½ inch bristle.
Wear a mask while you paint, leave the windows open and a table fan ushering the air from inside out the window.
D. A Fine Finish
This last step is rather wonderful. It adds appeal to a job well done. This is where you insert your final say and let the cabinets do the rest of the talking. You may be hard pressed to choose between satin, gloss, or semi-gloss by way of a hard finish. The harder the better, though; rule of thumb.
Aside firm looks, your core goal is practicality. The cabinets need to look good as new for the next several years. In addition, you should be able to clean them without inconvenience. The right finish ensures this possibility.
Conclusion
After all these steps, you should be able to refinish your kitchen cabinets. If they shine as new, don’t forget post images to us to share your joys.